Every online form begins the same way, by creating the form's structure. From there, you'll add questions.
Where do I find it?
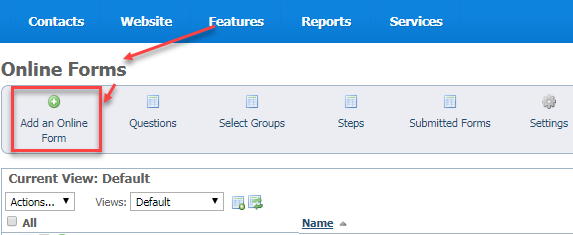
You can find the Add an Online Form page by going to Features > Online Forms and clicking the Add an Online Form button.
Adding a new form
Once you click the Add an Online Form button, the form opens. What you see in this first screen is the behind-the-scenes structure of your form. In this first part of the form, you'll make decisions on how the form is presented and used, and you'll create a message for those who have just filled out the form.
These fields require you to fill out certain information, as marked by an asterisk, but as you'll see in the explanation below, other information can be gathered and is helpful.
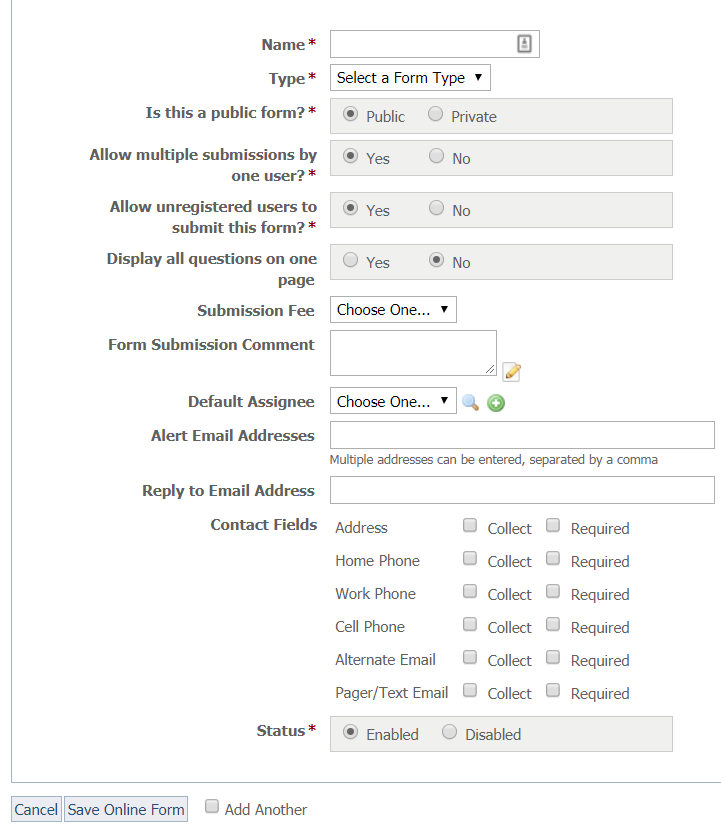
When adding an online form you will be asked to provide the following information:
- Name:* Enter a name for the form. Your visitors will be able to identify the form by its name and type. Example: Adoption Application or Foster Application.
- Type:* Select the form type for this new form from the drop-down list:
- Is this a public form:* You can choose if you want the form to be public or private. Public forms can be submitted by anyone who registers on your website. Private forms are not available to your visitors unless you email them a link to the form. The form will not appear in the list of forms on the My Rescue web page.
- Allow multiple submissions by one user:* Should a single visitor be able to submit this form more than once? Keep in mind that a visitor can still register multiple usernames and still submit the form multiple times.
- Allow unregistered users to submit this form:* Should your visitors be required to register and log in before they can submit this form, or should an unregistered user be able to submit the form? If you select Yes, all of your form questions will be presented on one page for the user to complete.
- Display all questions on one page: You can choose if you want your entire form to be displayed on one web page or split up by pages? (Even if set to 'No', a visitor must be logged in to view the form on separate pages)
- Submission fee: If you have added items to your Online Store, you can select one of them to be a Form Fee (application fee) for this form. The user will be directed to the selected Online Store item when they submit the form. You should also add a sentence in the Form Comment so that the visitor knows they must pay an application fee.
- Form submission comment: The Form Submission Comment is the text that is emailed to the user when they submit the form.
- Default Assignee: You can choose which of your volunteers to assign Submitted Forms to by default for the form. Only contacts that are in the Volunteer group are available in this list for you to select.
- Alert Email Addresses: You can specify email addresses to which Submitted Forms alerts should be sent. Multiple addresses can be entered, separated by a comma. (Any volunteer whose options are set to receive alerts for Submitted Forms will still receive them.)
- Reply to Email Address: You can set an email address that submission emails are sent from and to which a reply is sent.
- Contact Fields: Select which built-in contact fields to display and require on your forms.
- Status:* Select the status of the form -- if it should be enabled and accessible to visitors (this is different from public and private), or if it should be disabled. Take your time and ensure your application is the way you want it, then select to enable the form. If you want to make changes to the form, you can temporarily disable it if you like. You can also enable and disable forms from the list of online forms (Features > Online Forms). You can disable or enable multiple forms at once from that list. See the screenshot below under Deleting an online form.
When you have entered the required information to your satisfaction, click Save Online Form. Remember, you can save and return to this form later to complete it. Just click the edit button next to the form in your list of forms. See the section below about Editing an online form or Deleting an online form to return to your form and change it or to delete it and start again.
You've completed the structure of the form, the next step is to add questions to the form you just created. To add questions to a form, you must have already added questions to your account. Let's do that. See the chapter in this guide, Adding online form questions.
Editing an online form
Where do I find it?
You can edit an online form by going to Features > Online Forms.
From the list of resulting forms, click the name of the one you want to change. When the next page opens, scroll down to the left bottom and click the Edit button. When you have edited your form, click Save Online Form.
You can also edit a form simply by clicking the Edit icon to the left of the name of the form you want to change in the list of online forms. When the next page opens, scroll down to the left bottom and click the Edit button. When you have edited your form, click Save Online Form.
Deleting an online form
You can edit, delete, enable, and disable a form from the list of online forms (Features > Online Forms). Here's the difference:
- Select Delete when you want to eliminate the form.
- Select Disable when you want to keep the form but make it unavailable.
- Select Enable when you want to make the form available again.
To delete, disable, or enable a form, select the form or forms you want to change by ticking the box to the far left of the name. From the drop-down Actions menu, select any of the choices: Delete, Disable, Enable.

Popular Questions
- 0votes
- 0votes
- 0votes
- 0votes
- 0votes
- 0votes
- 0votes
- 0votes
- 0votes
- 0votes
Have a question about this topic?
Overview
Content Tools