You can create an online store from which to offer merchandise or services. The store feature must be enabled for you to use it.
Where do I find it?
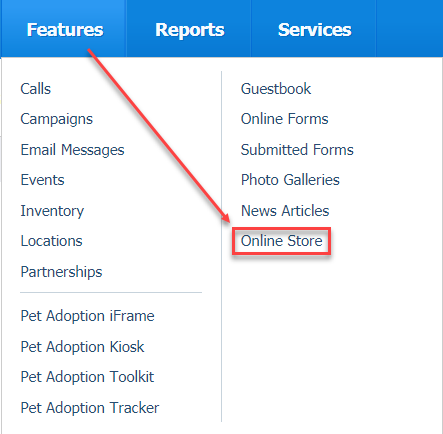
You can find the Online Store page by going to Features > Online Store.
On this page:
Related pages:
The Online Store is a RescueGroups.org feature that allows you to sell items on your RescueGroups.org website. Your customers use a PayPal shopping cart to purchase the items, so you don't have to worry about handling credit card information or online payments. You can sell products, services, or solicit donations for things such as the Memorial page.
You must have a PayPal account to use this feature. If you do not already have a PayPal account, you can sign up for one on their website.
Enabling PayPal
To enable the use of PayPal on your website, follow these instructions:
- Go to Website > Affiliates.
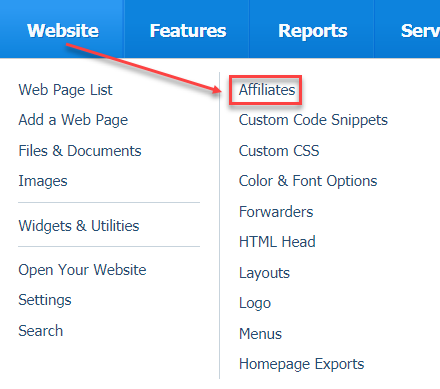
- Enter your organization PayPal email address.

- Check Enable PayPal Donate Button to be able to use a PayPal button on your website.
- Click Save Affiliates.
Enabling the Online Store
To enable the use of the Online Store feature:
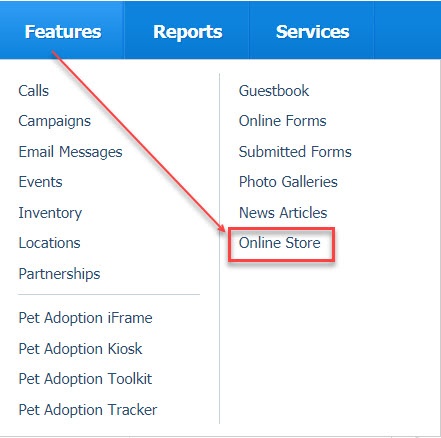
- Go to Features > Online Store.
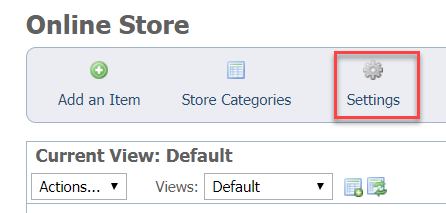
- Click the Settings Icon.
- Enable the Online Store.
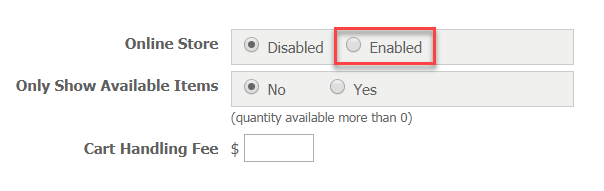
- Click Save Settings.
Creating a Store Category
In order to add items to your online store, you must create categories to use to sort the items. To create categories:
- Go to the Online Store (Features > Online Store).
- Click the Store Categories icon.
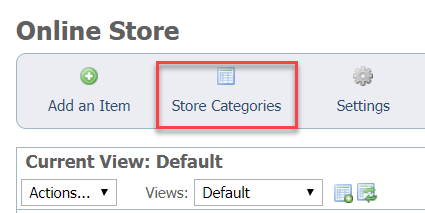
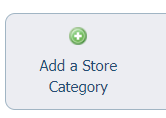
- Click the Add a Store Category icon.
- Name your category with a descriptive name.
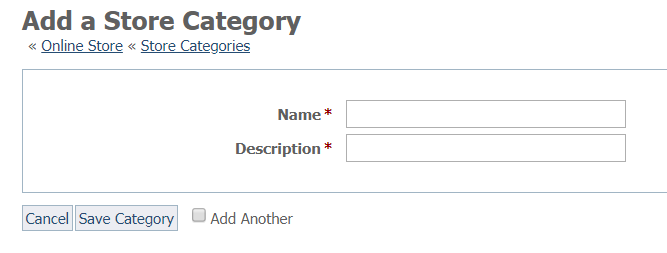
- Enter a brief description.
- Click Save Category or tick the Add Another checkbox and then click Save Category.
Adding an Item to the store
- Go to the Online Store (Features > Online Store)
- Click the Add an Item
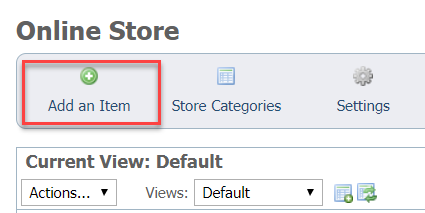
- Name your item.
- Enter a description.
- Enter the price.
- Click Save Store Item.
Adding Items to Store Category with Images (Media)
You now have created both a store category and a store item. Since you've just added the item, you will see links to add the item to a category and to add media to the item above the item in the list of items in your Online Store. Now add the item to a category and add images (media) to the item. You will see these links when you click an item in your online store list of items.
![]()
Adding items to categories
- Click Save Item toCategory.
Adding images to an item
Pictures are great when you want to sell an item. To add images (media) to your item:
- Click the item from the list of items in your online store.
- Click the Media link above the item.
- Click the Add a Picture for this Item icon.
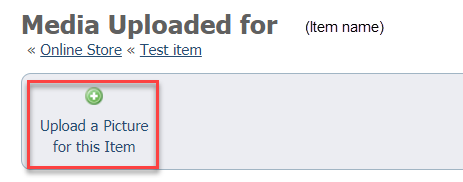
- Click the Media to add images to the store item.
- Click Upload a Picture for this Item.
- Click Upload Store Item Photo to save.
For best image quality resize the images for the store items to 350 x 250 pixels.
Popular Questions
- 0votes
- 0votes
- 0votes
- 0votes
- 0votes
- 0votes
- 0votes
Have a question about this topic?
Overview
Content Tools