An event is any occasion your organization attends. You might bring animals to an event, for instance, at your local pet store regular weekly adoption day, or a special adoption event, or an event might simply be a fundraiser for the non-furry members of the organization. With the Events feature, events can be tied to other features. For instance, you can use the settings to select an option to display your event on your RescueGroups.org website home page. You can use both the News feature and the Email Marketing Service to publicize your event.
With both the Data Management Service and the Website Service, you can track events and which animals attend each.
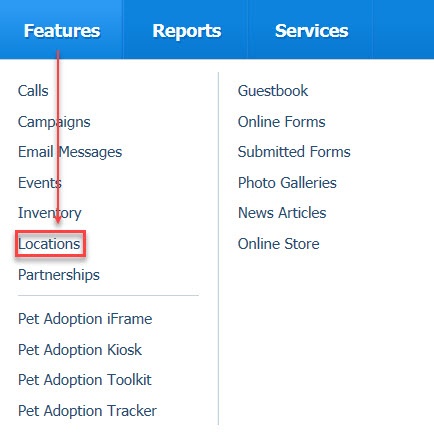
The Events feature is closely tied to the animal and contacts meet requests and to the Locations features. Events require a Location. Requests for meetings with an animal require an Event. You can find meeting requests for an animal both on the animal's page and on the contact's page. All of these features can be tied together to give you a robust way to publicize events, promote adoptions, and easily ensure animals that specific people want to meet are available.
Where do I find it?
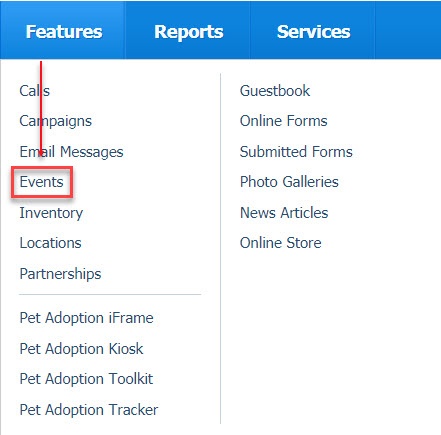
You can find the Events page by going to Features > Events.
It's easy to create an Event when your organization is having a fundraiser or adoption day. You can even include a map to the event in the announcement of your event.
Remember before you can use the Events feature, you must enable the use of the feature. See below. In addition, you may want to read these chapters to enable features that allow website visitors to request to meet specific animals:
Enabling Events
If you have not yet done so, enable the Events feature before setting up an event. To enable the use of the Events feature:
Note that you can select a map service for your visitors at the same time you enable an event. See step 2 below. You can also come back to do that at another time. See the chapter About Locations for additional information about using the map service with your event.
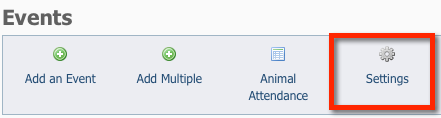
- Go to Features > Events and click Settings.
- Click the Yes radio button under Enable the Events feature. Note that you can select a map service at the same time you enable the Events feature. Simply tick the radio button for the map service you want to use. This map service selection is used in conjunction with the location for the event. When visitors read about an event, they have the option to check its location with the map service you just selected. See below for information about Adding locations.
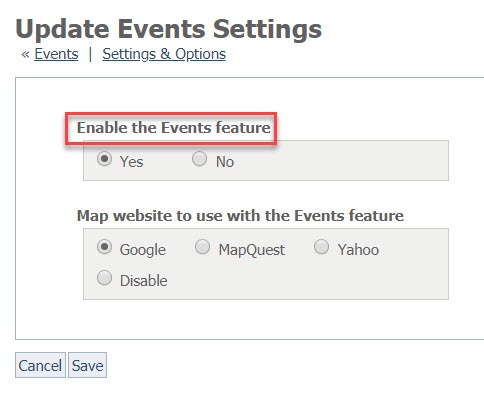
To specify which online mapping service you would like to use, select by ticking the appropriate map radio button:
- MapQuest
- Yahoo
- Disable (do not offer a map service)
- Click Save.
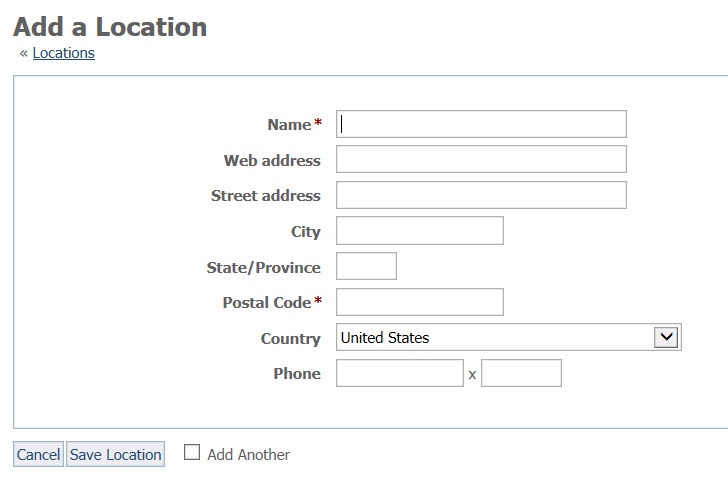
Every event must have a Location. See below for information about Adding Locations.
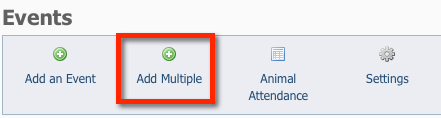
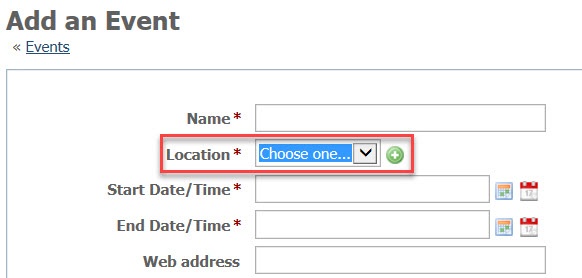
Adding a single Event
To add a single event, such as a fundraiser or an adoption event:
- Click Add an Event.
A form opens which allows you to disseminate details about the event.
- Name the event using a name that is meaningful to you, such as Murry's Pet Store or Annual Fundraiser 2019.
- Select the event location from the drop-down list. If you don't have any Locations saved, click the green plus sign
 next to the arrow to add a location. See below for information about Adding locations. For detailed information about using Locations, see the chapter About Locations.
 - Use the calendar icons to choose a start date and time and an end date and time.
- If the location has an address on the Web, include the website URL, if pertinent.
- Use the WYSIWYG editor to add a description for the event. You can use this description area to add photos and video. See the chapter, Using the editor for details about how to use the editing function.
- Check the checkboxes for the species attending the event. You must tick off all the species which might be attending the event in order to add those animals to the event. For instance, if you are a cat rescue but have a few adoptable dogs and one of them will be at the event, make sure you tick off cats and dogs.
- Save the Event.
You can add either a single event or a recurring event. You can also copy an existing event by clicking the Copy icon next to that event in the list of events (Find at Features > Events). You can then make changes to the copied event to create a new event. This is useful when, for instance, you do adoptions at different pet stores, so the information is the same but the day and location are different.
Adding a recurring Event
To add a recurring event, such as weekly adoption days at the same local pet store:
- Click Add Multiple.
- Complete the Event fields as described above in Adding a single event.
- For a recurring event, select the day of the month and the number of events to create.
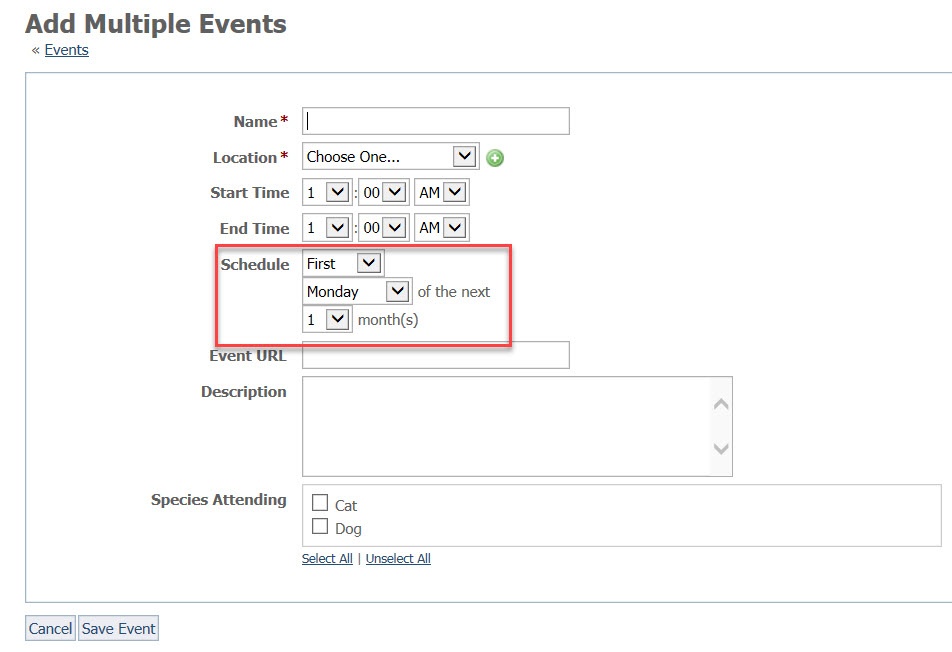
- Once you have entered the event information, click Save Event. After you add a recurring event, a new event will be added for each occurrence of the event.
Adding locations
When you add an Event, you can specify the Location of the event by using the drop-down list of all the locations you've added to your account (Find at Features > Locations). You can click the plus sign to add a new location if needed.
Visitors to the website will be able to find a map to the location address you have entered with the map service you selected above. Learn more about Locations in the chapter About Locations.
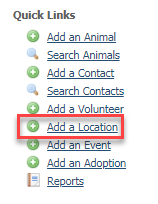
You can add a Location from the Home page of your account using the Quick Links.
Editing an event
You can edit an event by clicking Edit from the Actions list next to the event in the event list. See the illustration below. When you open the form to edit, it looks just like it did when you added the event, simply correct or change what you like and save the result.
Deleting an event
You can delete an event by clicking Delete from the Actions list next to the event from the event list.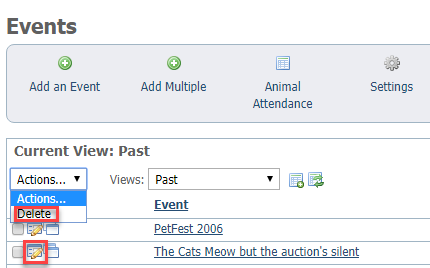
Popular Questions
- 0votes
- 0votes
- 0votes
- 0votes
- 0votes
- 0votes
- 0votes
Have a question about this topic?
Overview
Content Tools