Where do I find it?
You can find the Pet Adoption iFrame page by going to Features > Pet Adoption iFrame
API Exports Required
To use the iframe, your organization must have API Exports enabled.
On this page:
Related pages:
Adding the iFrame to your website and Facebook page
To add the iFrame to your website, copy and paste the iFrame code to your webpage and save.
To display your adoptable pets on your organization's Facebook page, use any app that allows you to add HTML to a Facebook page. This article reviews five popular apps: https://www.practicalecommerce.com/5-Free-Facebook-Welcome-Tab-Apps-Pros-and-Cons.
Unfortunately, Facebook does not support custom tabs on their mobile page views or apps at this time. You can read more about this on Facebook's developer documentation here:
https://developers.facebook.com/docs/pages/tabs/
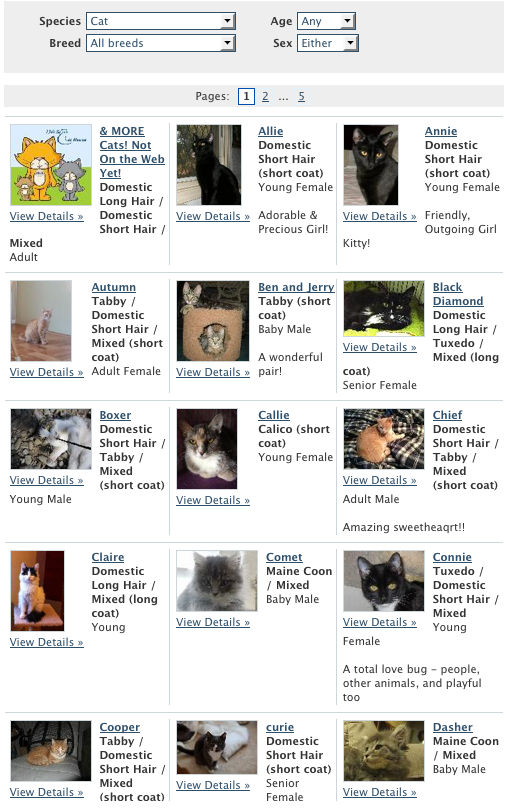
Overview of iFrame
Example of the iFrame
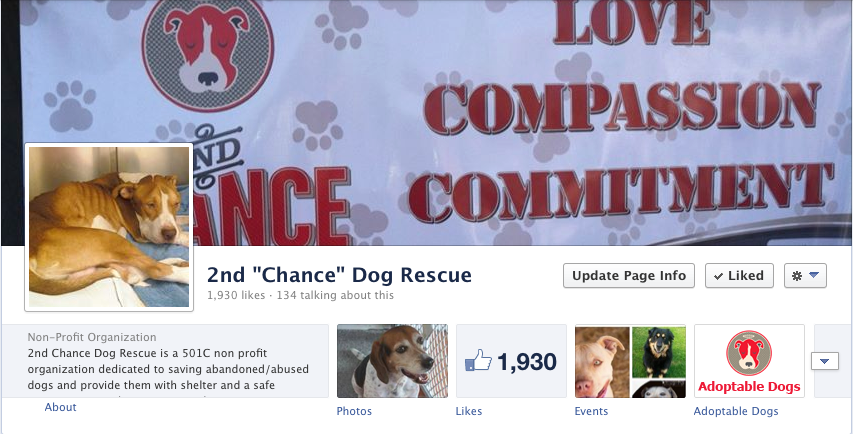
Adding the iFrame to your Facebook page
- Add an HTML App to your Facebook page (see above for a review of various apps you can use).
- Select your organization's Facebook Page when asked for the page to which to add the application.
- Add the static HTML app.
- Get the Pet Adoption iFrame HTML by opening a new browser window or tab so you can access the Pet Adoption iFrame HTML in your RescueGroups.org service.
- Using the two browser tabs or browser windows, copy from RescueGroups.org and paste into Facebook.
- In the new tab or window, go to your organization's account dashboard.
- Then go to Features > Pet Adoption iFrame.

- Choose either the narrow or wide option for displaying your pet list.
- Select and copy the code you would like to use (control+c on a pc or command+c on a mac).

Paste the Pet Adoption iFrame HTML into the Facebook HTML App which is open in the other tab.
Customizing the Tab Name, adding a Custom Icon
Special thanks to 2nd Chance Dog Rescue for allowing us to use their page in this example.
Follow these instructions to customize the name of your tab and add a custom image.
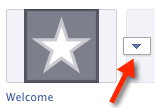
- From your Facebook organization's Facebook page, click on the downward arrow icon next to the tabs.
- Click the edit icon. It looks like a pencil.
- Select Edit Settings.

- To change the tab name, enter text next to Custom Tab Name.
- Click Save.
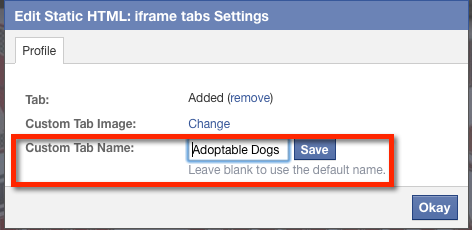
- Next to Custom Tab Image, click Change.
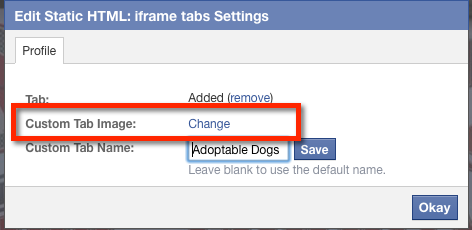
- Hover over the tab image, and click Edit.
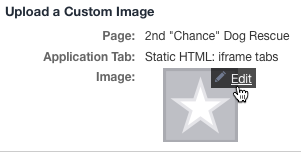
- Click Choose File
- Browse and select the file on your hard drive you would like to upload.
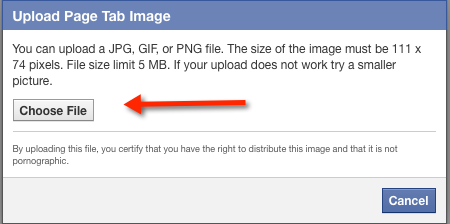
- If the image is successfully uploaded, your image displays.
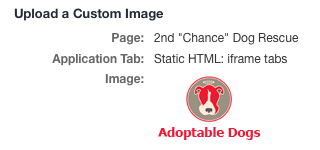
- Return to your organization's Facebook page. You will now see your customized tab text and image.

Tips for Creating a Custom Tab Image
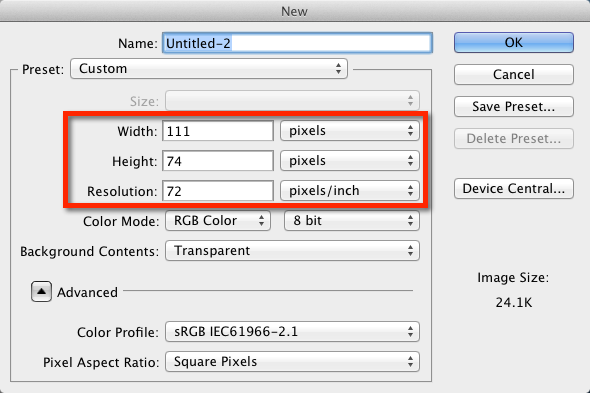
To upload a custom image, you need to be able to create an image that is 111 x 74 pixels.
- If you have photoshop, create a new file and set the width, height, and resolution:
- Width: 111 pixels
- Height: 74 pixels
- Resolution: 72 pixels/inch
- You can add images to one layer and text to another layer.
- You could create an image with text only or a photo. It's up to you.
- Here is the image that was created for 2nd Chance for Dogs.

- The logo was added on one layer and resized.
- The text was added to another layer.
Custom Facebook tab image templates
Here are both a blank photoshop file and a blank png with these exact dimensions to help you get started. Click to download and use as templates.
Free Facebook tab images
Below are Facebook tab images that we've created for your use. How to save an image below to your computer:
Right mouse-click on an image, then select Save As to save it to your hard drive.


Popular Questions
- 0votes
- 0votes
- 0votes
- 0votes
- 0votes
- 0votes
- 0votes
- 0votes
Have a question about this topic?
Overview
Content Tools