You can edit both the look of the marketing email and the contents of the message. When editing the content of your email, you can edit the plain text or the HTML content. You can edit as you create, or you can create a campaign and edit it later. Once you've created your campaign or several campaigns, you may want to go back to one and edit it, either to resend or to have an edited, ready-to-go custom template for a future campaign. The list of campaigns, available from the Email Marketing Campaigns menu, is a data table and can be manipulated like all the other data tables in the RescueGroups.org account. If you need a refresher on how to use data tables, check out the Getting started with RescueGroups.org guide, and look for the chapter, How information is organized in your account.
Where do I find it?
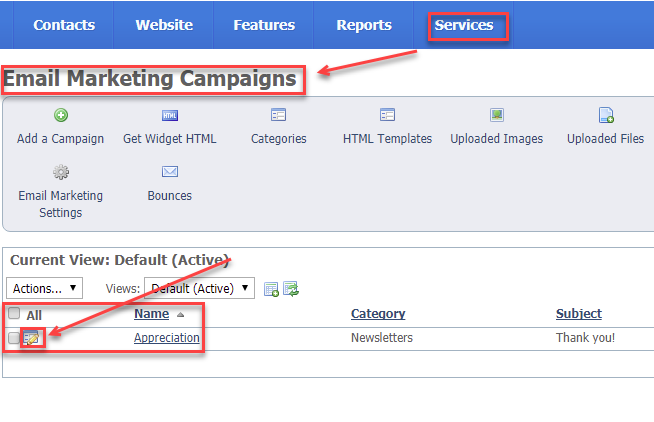
You can edit an email marketing campaign at any time by going to Services > Email Marketing Campaigns, then clicking the Edit icon next to the campaign you want to change.

- To adjust the template font, font size, colors, and width click Edit HTML Email Look & Feel.

- To edit the contents of your campaign (text, photos etc), click Edit HTML Email Contents.
Undoing changes
At any time you can click Undo Changes and the preview will forget your unsaved changes and reload with the saved Look & Feel settings.
Clicking Undo Changes will cause you to lose any unsaved changes.
Editing an existing campaign
To edit a pre-existing campaign, go to the Email Marketing Campaigns menu and select the campaign to edit.
Scroll to the name of the campaign you want to edit and click the edit icon.

Changing the colors in the email
To change the colors in the email:
- Select the colors for the background and fonts.
If you know the hexadecimal color code, enter it in the appropriate field (#ffffff).
If you do not know the hexadecimal code, click the multicolored squares to open the ColorPicker and select a color. - Select the font family and size.
- Click Refresh Preview at any time to view your changes in the Preview area below.
- When done, click Save Changes.

Editing the HTML contents
IMPORTANT
When adding content:
If you are pasting text from Microsoft Word or an email, be sure to use the Paste from Word, or Paste as Plain Text icons. This removes any non-HTML-compliant formatting. These icons are on the top row.

To change the text in the message, click the Edit HTML Email Contents button.
![]()
You can include a signup box so that your contacts can elect to receive more emails from you. Read the page, Email Sign Up Widget Code.
Select the part of the email message you want to change:
- Click Header Content, Main Content, or Footer Content to edit the contents of each of those sections of your email.

For this example, we clicked Header Content.
- Edit the content by typing in the editor (the green area in our example)
- Format your text using the icons in the editor.
- You can also Upload an Image or File by clicking the buttons Upload an Image or Upload a File.

- When done, click Preview at the bottom of the page to see your changes.

- After reviewing your content, click Back to Campaign.

- When you've completed your changes, remember to click Save Changes.

Overview
Content Tools