This article explains how to create a table and add images to the table. We will also cover how to add text and links in the table like in the example below.

To get an idea of how tables work, you may want to first read about HTML Tables:
- http://www.w3schools.com/html/html_tables.asp
- http://www.htmlgoodies.com/tutorials/tables/article.php/3479851
On this page:
<table align="center" border="0" cellpadding="0" cellspacing="0" id="topbuttons" style="width: 100%;"> <tbody> <tr> <td align="center" style="text-align: center; vertical-align: top; width: 25%;" valign="bottom" width="25%"><a href="/animals/browse?special=kitten"><img alt="" height="138" src="https://s3.amazonaws.com/imagesroot.rescuegroups.org/webpages/s970noa4oavda2q.png" style="border-width: 0px; border-style: solid;" width="175"></a></td> <td align="center" style="text-align: center; vertical-align: top; width: 25%;" valign="bottom" width="25%"><a href="/animals/browse?species=Cat&special=adult"><img alt="" height="138" src="https://s3.amazonaws.com/imagesroot.rescuegroups.org/webpages/s970nt6topmybvn.png" style="border-width: 0px; border-style: solid;" width="175"></a></td> <td align="center" style="text-align: center; vertical-align: top; width: 25%;" valign="bottom" width="25%"><a href="/animals/browse?special=needs"><img alt="" height="138" src="https://s3.amazonaws.com/imagesroot.rescuegroups.org/webpages/s970n4ubo57qwo5.png" style="border-width: 0px; border-style: solid;" width="175"></a></td> <td align="center" style="text-align: center; vertical-align: top; width: 25%;" valign="bottom" width="25%"><a href="/animals/browse?Courtesy=Yes"><img alt="" height="138" src="https://s3.amazonaws.com/imagesroot.rescuegroups.org/webpages/s970nty9yxmk919.png" style="border-width: 0px; border-style: solid;" width="175"></a></td> </tr> <tr> <td align="center" style="text-align: center; vertical-align: top; width: 25%; padding:0px;" valign="top"> <h2><a href="/animals/browse?special=kitten">Kittens</a></h2> </td> <td align="center" height="10%" style="text-align: center; vertical-align: top; width: 25%;" valign="top"> <h2><a href="/animals/browse?species=Cat&special=adult">Cats</a></h2> </td> <td style="text-align: center; vertical-align: top; width: 25%;"> <h2><a href="/animals/browse?special=needs">Special Needs</a></h2> </td> <td style="text-align: center; vertical-align: top; width: 25%;"> <h2><a href="/animals/browse?Courtesy=Yes">Courtesy Listings</a></h2> </td> </tr> </tbody> </table>
Step-by-step guide
If this is a table that will hold images, it is a good idea to upload the images first, then add them to the table.
It's a good idea to resize or "crop" your images to the size you are wanting before uploading them. So if all images need to be the same size / dimensions, do that before uploading the images.
GIMP is a free image editing tool: http://www.gimp.org/
Upload your images:
- From manage.rescuegroups.org, click on Website > Images
- Click Upload an Image
- Do this for all of the images that will be added to the table.
Edit the web page you are wanting to add the table to:
- From manage.rescuegroups.org, click on Website > Web Page List
- Click the edit icon next to the web page you want to add the table

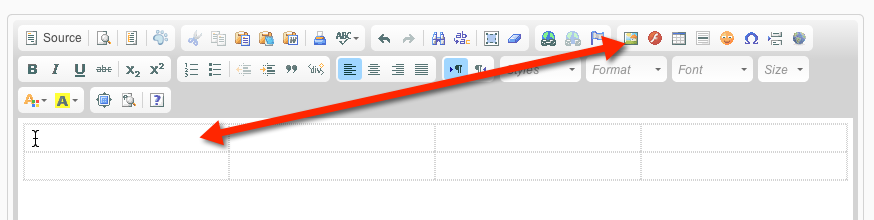
- Click on the table icon in the page editor.
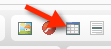
- This will bring up the Table Properties.
In this example we are creating a table with 2 rows, and 4 columns. The width is set to 100%. Don't forget to add the percent symbol. There is no border (0), no cell spacing (0) (space between the table's cells) and no cell padding (0) (that is the padding for the content inside of the cell). The alignment is set to center.
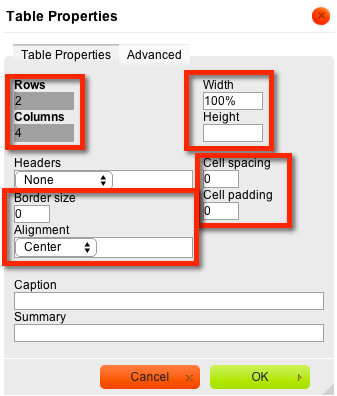
- Click OK
![]()
- This is your blank table.
Now to let's add some content.
- Put your cursor in the first cell, top row.
- Click on the Image icon.
- In the image properties, at the bottom use the Image List Pull down to select your image you want to place.
- Add in Alternative Text. A short title of what the image is.
- Add in a border of 0 if you will be adding a link. This will prevent border appearing around each of your images when links are added.
- Click Ok.

- Do this for each cell in the 4 columns to add the rest of your images.
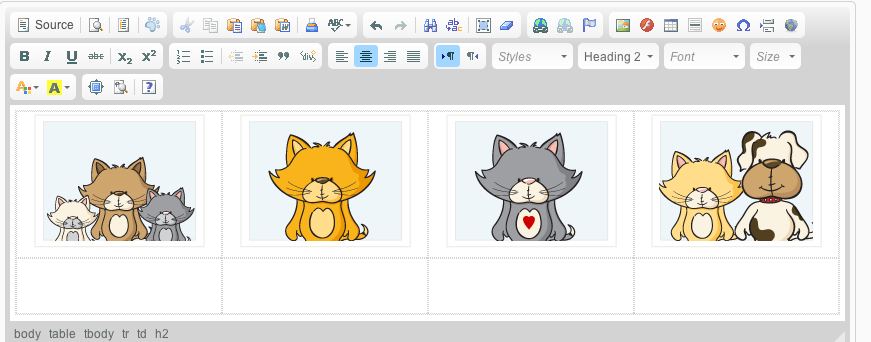
Next we will add text and then add links the text.
- Add in text below each image.
- Use your cursor to select the text "Kittens".
- Click on the link icon.
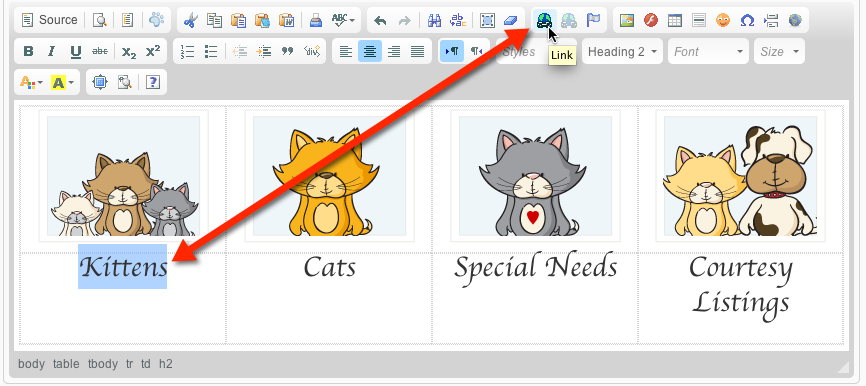
- Under Link List, use the Pull Down List to select a web page on your site. You can also use this to link to a file or form on your site as well.
- In this example, I selected Web Page - Animal Browse: Kittens. This automatically placed the correct url to my web page - highlighted in yellow.
- Click OK

- Repeat this for all of the text links in your table.
Next we will add links to the images in your table.
- Select the first image in your table.
- With the image selected, click on the link icon.

- Under Link List, use the Pull Down List to select a web page on your site. You can also use this to link to a file or form on your site as well.
- In this example, I selected Web Page - Animal Browse: Kittens. This automatically placed the correct url to my web page - highlighted in yellow.
- Click OK

- Repeat this for all of the images in your table you want to have links.
- Click Save. Note: You may also want to save earlier and more often.
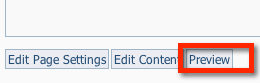
- On this next screen you can click Preview to view your web page with the table in your browser.
Adjusting Alignment
You may find that you need to adjust the alignment of the text or images in the table.
- Do do that, edit your page again.
- Select the cell with one of the images, right mouse-click on the cell to bring up the pop up dialog to edit the cell, or table properties.
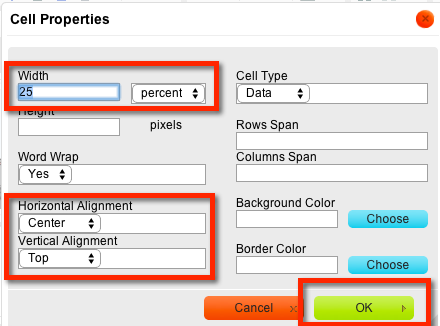
- In this example, we will edit the Cell Properties

- This will open the Cell Properties.
- Because we have 4 images and the table is set to be 100% wide, we want the cell width for each cell to be 25% each.
- We also want the horizontal alignment to be center and vertical alignment to be top.
- Click OK.
- Repeat this for each cell in your table.
Depending on how wide you want your table to be and how many images you have, you may need to use a little math to adjust everything properly.
If you had two images and one was wider than the other, and your table was set to be 100%, you may want the wider cell to be 60% and the smaller cell to be 40%; the total needs to equal 100%.
You could also do this using pixels and set the widths to be a specific size like 250 px. Keep in mind, if you do that, you need to also account for any cell padding or cell spacing. That will affect the math and the overall size.
Troubleshooting
Q: I see blue borders around my images after I added the links.
A: Be sure you set the border to 0 for each of the images. Select the image, click on the image icon, make sure the border is set to 0.
Popular Questions
Have a question about this topic?
Overview
Content Tools