When you have an interaction with or a comment about a contact, you can track it by use of a journal entry, just as you track volunteer tasks for your volunteers.
Adding journal entries
To track journal entries for your contacts:
- Go to Contacts > Journal Entries.

- Click Add a Journal Entry.

- Fill out the form:
- Use the drop-down list to select a contact.
Add the type of interaction. These types are not pre-set, so you must create your own list. If you want to later find out, for instance, how many informational calls you had with your contact, you can pull a report. Therefore, we highly recommend you word the type of interaction the same way each time, for instance: informational call, adoption checkup, complain, and keep a list accessible for all volunteers who have contact with the public.
NOTE:
To be able to sort a report of similar interactions, phrase the type of interaction and capitalize it the same way consistently.
Add the date of the interaction. As with all data tables, the first icon brings up a calendar for you to select the date. The second icon fills in today's date.
- Add any type of comment, for instance, what the telephone call was about, how the animal was doing in its new home, or any concerns.
- Use the drop-down list to select a contact.
- Save the journal entry. As with all data table entries, you can select Save Journal Entry to save this entry and close, or you can click Add Another to save this entry and open a new entry.
Pulling a report of contact entries
Because the list of journal entries is a data table, you can pull a report and create custom views. It acts like any other data table in your account. For information about how to use data tables, see the Getting started with Rescue Groups guide for the section, How information is organized in your account.
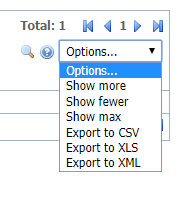
From Contacts > Journal Entries, select the Options pull-down menu on the far right. You can export the report to a program such as XLS and manipulate the data to find the information you need.
Overview
Content Tools