You can upload images to the RescueGroups.org server and then insert them into your web pages and email marketing campaigns. The image is uploaded and stored on our server. There is no limit to the number of images or storage space you can use for these images.
Where do I find it?
The Web Images module is available with the Website service and Email Marketing Campaigns services. With the Website service, you can access Images from the Website menu, clicking Images. With the Email Marketing Campaigns service, you can access Images by going to Services > Email Marketing: Campaigns and clicking Images.
The Web Images module supports miscellaneous images but is not meant for animal pictures or pictures that you'd put into a photo gallery or animal description pages. For more information on uploading animal pictures, see the Animals section of this guide.
Supported image formats
We support only the following image formats for upload: GIF, JPG, PNG. If you have a file of a different format that you want to be available for download from your website (like a Word document or PDF file) you can use the Files & Documents module.
On this page:
Where do I find it?
The Web Images module is available with the Website service and Email Marketing Campaigns services. With the Website service, you can access Web Images from the Website menu. With the Email Marketing Campaigns service, you can access Web Images by going to Services > Email Marketing: Campaigns and clicking on Images.
Inserting an image on a web page
To insert an image on a web page, you must first upload the image to the server:
- Go to Website > Images.

- Click Upload an Image.

- Click Choose File to select the image from your computer and name the image.
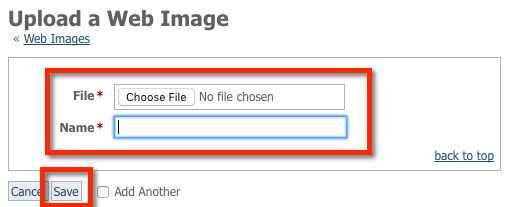
- Click Save. After the image is uploaded, it will be listed in the image drop-down list when you are editing a web page or email marketing campaign. For an example, see the Adding an image to a web page section below.
View an existing image
To view an image you have already uploaded, click the image/picture icon next to the image.
Delete an existing image
You can delete an existing image by selecting the checkbox next to the image(s) you want to delete and selecting Delete from the Action drop-down list.
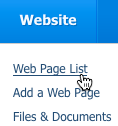
Adding an image to a web page
Once you've uploaded the image to the server, it's available for you to use on your web pages:
- Go to Website > Web Page List.
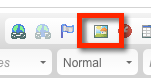
- Click the Edit icon next to a page you would like to add the image.

- Click the Image icon in the page editor (it looks like a little photograph).
- In the window that pops open, click the drop-down image list, “Please select an image from your uploaded images…” to select the image.
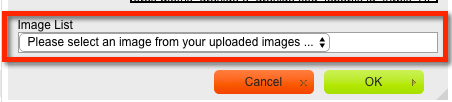
- If you like, you can modify the size of the image displayed from the original image size. Change the Width or the Height as needed.
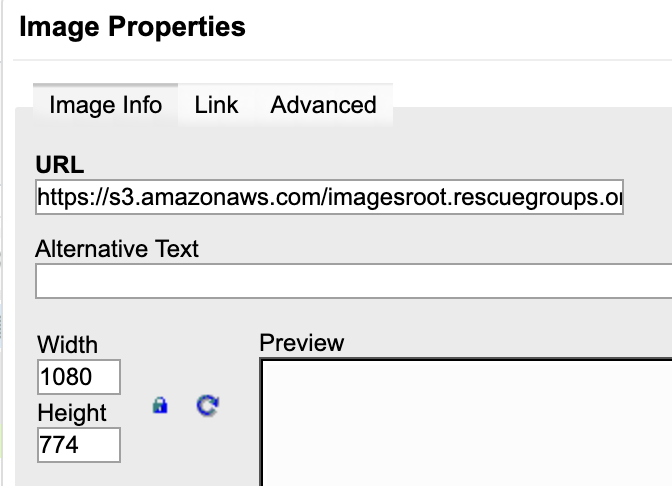
- Click OK to insert the image on your webpage.
- Now that you’ve added your image to the page, click Save Content to save your web page

Have a question about this topic?
Overview
Content Tools