What are success stories?
Success stories go beyond simply saying that an animal is adopted. This is a story you write about how the adoption turned out happily for both the adopters and the animal. It showcases some of your most successful adoptions in a beautiful way. You can include photos and files, such as newspaper stories, perhaps a handwritten letter from a child in the family, a clean bill of health after recovering from an illness, virtually anything you'd like. The story is created using our WYSIWYG editor. See the chapter Using the editor, which includes a video about the editor.
Adding a Success Story
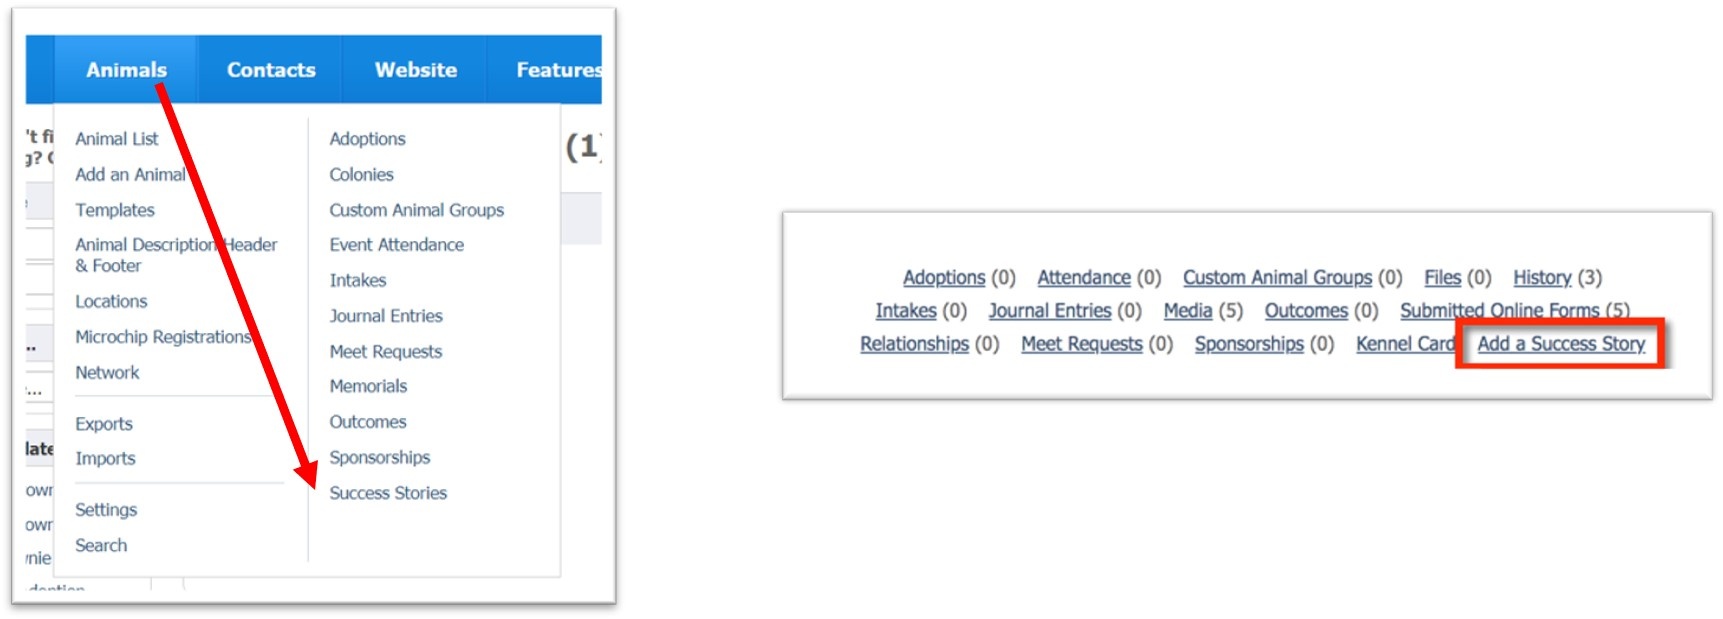
There are two ways you can add a success story by clicking the Add a Success Story button on the Success Stories page (Animals > Sucess Stories > Add a Success Story).
You also can add a success story by selecting the Animal Profile and Selecting the Add a Success Story link at the top (Animal Name > Add a Sucess Story).
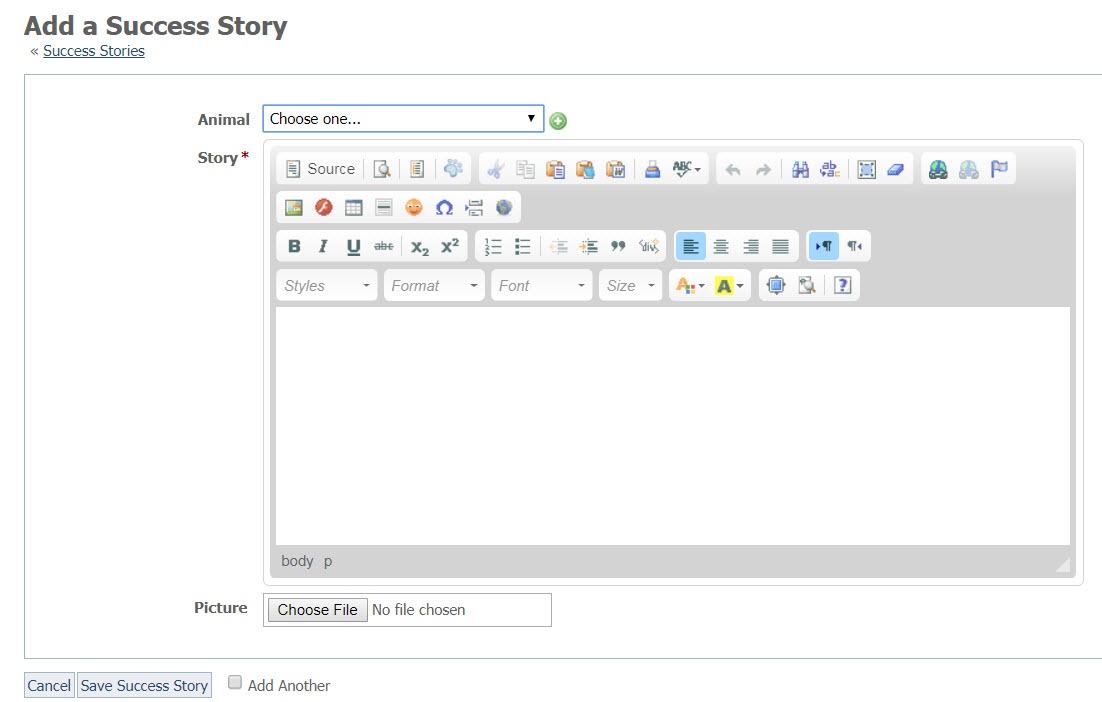
Either way, you add the success story, the resulting form is simply a choice of the animal about which you are writing, and the story you want to tell.
At the bottom of the form, you see the Choose File button, which enables you to select a file or image from your computer to include with the story.
Here is an explanation:
- Animal:* Select the animal to be associated with this success story.
- Story:* Enter the text of the story using the HTML editor.
- Picture: Select the picture you would like to upload with the success story.
Please note, the Adopted Date field has to be set on an animal record for animals to show up properly on the Successes page. We strongly recommend that you use the Adoptions feature rather than simply changing the status of an animal to Adopted.
Editing a success story
To edit a success story, click the Edit button next to the story you want to edit. The same WYSIWYG editor opens.
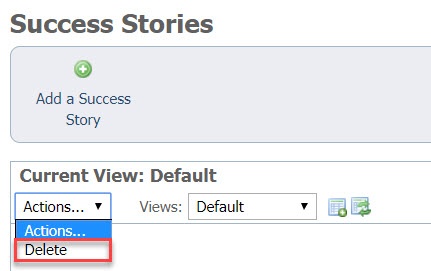
Deleting a success story
To delete a success story, select the check box next to the story in the list of stories and then select Delete from the Actions drop down.
Creating a data table view for your stories
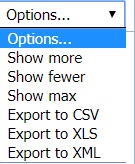
Because your success stories are contained in a data table, you can do some of the same things you can do with other data tables in your account, such as the Animals list or the Contacts list, can be done with your success stories. For instance, you can export the list of stories to a spreadsheet from the drop-down menu on the far right of the list.
You can also create a custom data table view for your stories. Click the Add a Data Table View icon from the top of the list. It's the icon on the left of the Actions drop-down list, an image of a spreadsheet with a plus sign on it. The other icon with the left-pointing arrow reverts to the default data table view.
![]()
The Add a Data Table View form opens. this is a simple form. See the explanation below.
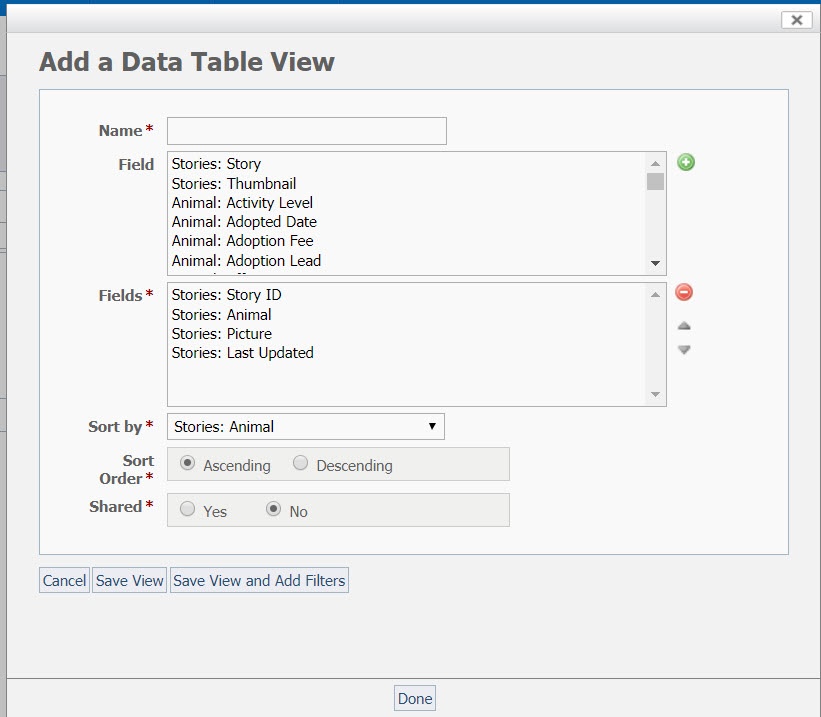
| Name | Description |
|---|---|
| Name | Name of animal: select from the drop-down list of your adopted animals for whom you've used the Adoption feature to record their adoption. |
| Field | Highlight the fields listed that you want to include on the page with this story. |
| Fields | Select from the Stories fields that information you want to include such as the Story ID, which is internal, but you may want to include in a report. |
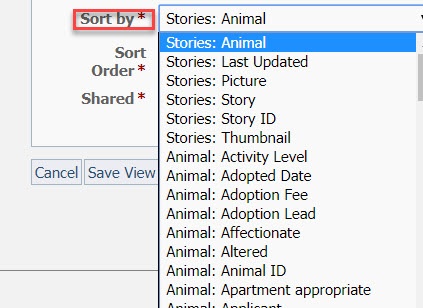
| Sort by | The way you want the list to be sorted, such as by Animal or by the most recent. Use the scroll bar on the right to scroll through the choices.
|
| Sort Order | Alphabetically A-Z or Z-A. (Ascending or Descending) |
| Shared | Select yes to share with other volunteers. |
Click Save View to save the view, Cancel to delete it before it's saved, or Save View and Add Filters. Filters help you to sort the data even more finely.
Overview
Content Tools