Page History
Once you've enabled your microchip registries and (step one from above) we can then register microchips for you. In other words, send the saved the required registrant information (name, address, email address, etc), we will submit that information along with the microchip number to the registries you have enabled.
You will receive an email and/or a message in your Message Center when the microchip registration is submitted. The message will include information regarding the results of the registration (success, failure) and any error messages we received from the Registry.
After the microchip registration information is saved, the registration submission cannot be canceled or changed. In order to change an existing registration, you must contact the Registry directly and follow their processes for changing the information.
Enabling microchip registrations
Microchip registrations will be submitted to all enabled registries.
Each registry has its own system, and you may need to follow additional instructions in order to be able to submit registrations to their databases.
FreePetChipRegistry
To enable microchip registrations with FreePetChipRegistry, do the following:
- Request an account from their website: http://www.freepetchipregistry.com. The username you select during registration is the username you will enter in step #6 below.
- Open your RescueGroups.org account from RescueGroups.org > Login.
- Go to Animals > Settings > Microchip Settings.
- Look for the section FreePetChipRegistry options.
- Select Yes for Enable FreePetChipRegistry registrations.
- Enter the username you were given by FreePetChipRegistry in the FreePetChipRegistry username text box.
- Click the Save button.
PetLink
| Note |
|---|
Only PetLink pre-registered/pre-paid microchips (which start with 98102) will be registered electronically with Petlink. Also, Datamars/Petlink microchips are registered with only the Petlink registry. Please contact RescueGroups.org support if you have any questions. |
| Info |
|---|
Please take note of the Petlink microchip setup process and the fact that after your account is created you must ask Petlink to enable the API Access on your account so that you can enable the microchip registrations from your RescueGroups.org account. |
To enable microchip registrations with PetLink, do the following:
- Request an account from their website:
- Go to http://www.petlink.net.
- Select Register from the top hand navigation.
- Click Register Shelter.
- Enter your contact information
- Select Other for Shelter Software.
- Enter RescueGroups.org in the box.
- Click Submit.
- Wait for the response from PetLink. When you receive confirmation from PetLink that your account has been created, contact them and ask that your account be enabled for "API access".
- Continue with the next step when you receive confirmation from them.
- Open your Manage account (https://manage.rescuegroups.org).
- Go to Animals > Settings > Microchip Settings.
- Look for the section PetLink options.
- Select Yes for Enable PetLink registrations.
- Enter the user name you were given by PetLink in the PetLink user name text box.
- Enter the password you were given by PetLink in the PetLink password text box.
- Click the Save button.
Below are directions on how you can register a microchip (once enabled) as well as information on how you know the registration was successful and how you can review your microchip registrations.
Registering a microchip
You can register a microchip through either the Animal add/edit pages Add page, the animal edit function, or the Adoption add page.
Registering through the Animal Add Page
To register a microchip through the animal pages , do the following:
...
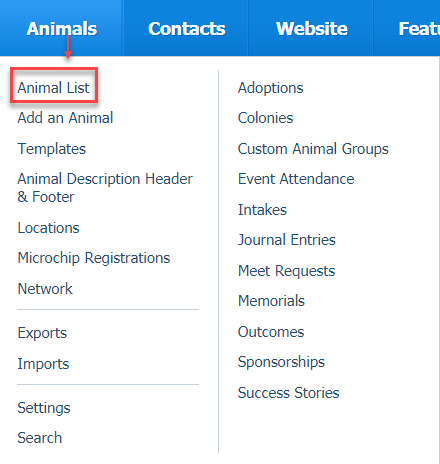
go to either the Animal Add page (Animals Add an Animal), or edit the animal from the animal list (Animals Animal List).

- Complete the animal information as you would normally.
- Scroll down to the Administrative Information section.
- Select the check box checkbox next to Register under Microchip Number.
- Enter the microchip registrants registrant's information in the fields that appear.
- Click Save.
Registering through an Animal Adoption
To register a microchip through the adoption page, do the following:
...
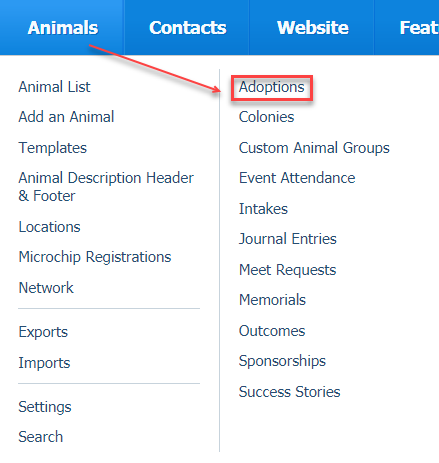
go to the Adoptions > Add page.
- Select the Animal and the Adopter.
- Click Next.
- Complete the adoption information as you would normally.
- Scroll down to the Microchip Information section.
- Select the check box checkbox next to Register under for Microchip Number.
- Enter the microchip registrants registrant's information in the fields that appear.
- Click Save.
...
You can see your list of microchip registrations by going to Animals > Microchip Registrations.
Reviewing your registration errors
You can review the errors from failed microchip registration attempts. Do view the errors for a registration, do the following:
- Go to Animals > Microchip Registrations.
- Find the registration in the list.
- Click the Microchip Registration ID number.
- Look for Registration Error(s).
Retrying a microchip registration
If a registration fails, you'll want to correct the issue and then retry the registration.
To mark a registration to be retried, do the following:
- Go to Animals > Microchip Registrations.
- Find the registration in the list.
- Select the check box next to the registration.
- Select Retry in the Actions drop down.
- Click OK.
Removing a microchip registration
If you need to remove the registration for a microchip (ex., the animal is returned), you should do the following:
- Contact the microchip registry and request that the registration be removed.
- Once the registry confirms that the registration has been removed, go to Animals > Microchip Registrations in RescueGroups.org. Select the checkboxes next to the chip registrations you wish to remove. Use the dropdown Actions menu to choose Delete.
- Re-register the microchip to the new owner.
Common microchip registration errors and messages
This microchip code has already been registered in the registry. You must contact the registry and have them remove the existing registration before you can re-register this microchip.
The microchip is already registered with the Registry. If you are trying to re-register a microchip you may need to contact the Registry and have the current registration removed before you can retry the registration.
The pet is missing a required field. Please edit the pet and select a value for the field.
The registry requires a value for one of the pet fields, and that value isn't currently provided on the animal that you are trying to register. Edit the animal and update the field that is shown in the error and retry the registration.
Registration of PetLink microchip not saved for non-PetLink registry.
learn more by watching our video on Microchip Registrations when adding animal adoptions:
| Widget Connector | ||
|---|---|---|
|
How to know if a microchip registration is successful
You will receive a message in your Message Center when a microchip registration is submitted. You can view the Message Center in your account dashboard, or by going to Services > Messaging Center. The message will include information regarding the results of the registration (success, failure) and any error messages we received from the Registry.
| Warning | ||
|---|---|---|
| ||
Our Animal Microchip Settings page mentions email alerts for microchip registrations. This feature is not currently implemented and no email alerts are sent for the microchip registration process. |


When a microchip registration is attempted, we get a response from the registry and that response (success/error) shows up under the specific registration listed under Animals > Microchip Registrations. So you can always go to the microchip registration list to get more information about success/failure status of your registration.

Another way to view the success or failure of a microchip registration is to access the Microchip Registrations list (see below, Reviewing your microchip registrations). You may also find our guide, How to use the automatic microchip registration feature, helpful as it contains information on troubleshooting and common errors.
| Anchor | ||||
|---|---|---|---|---|
|
You can see your list of microchip registrations by going to Animals > Microchip Registrations.
 As mentioned above, Datamars microchips are sent only to the PetLink registry. This message means that the registration of a Datamars microchip will not be sent to a non-PetLink registry (eg., FreePetChipRegistry).
Overview
Content Tools