Page History
Using CSS with the Toolkit
Cascading Style Sheets (CSS) is a simple mechanism for adding style (e.g. fonts, colors, spacing) to Web documents.
To edit a stylesheet, you need to be familiar with CSSThe CSS defines the color, size, and position of text and HTML tags such as body or paragraph, while the HTML delivers the content and defines how it is organized. By separating the two, you can change the colors of your site without changing the entire website. The cascading part of this means you only have to change a parent page, and all the children pages will change as well. Working with CSS is a time saver for you. But remember that if you have a problem, contact us for help. You can view the methods of finding support in our Getting started with RescueGroups.org guide on the Getting support page.. You can learn more about CSS and what you can do with it from many sources.
With the three levels of CSS styles in the Pet Adoption Toolkit, you can go from basic changes to your own custom design.
The Toolkit includes three levels of CSS styles
...
Styles | Location | Purpose |
|---|---|---|
Default | Included in the Toolkit code, and is inaccessible to the user | Provides default styles |
Search Container Options | Search container background color and search result hover color | Allows simple selection of colors |
Key Styles (custom style sheet) | Located within each key, blank style sheet (enter custom CSS on the Style and Color Options) | Allows custom styles for advanced users |
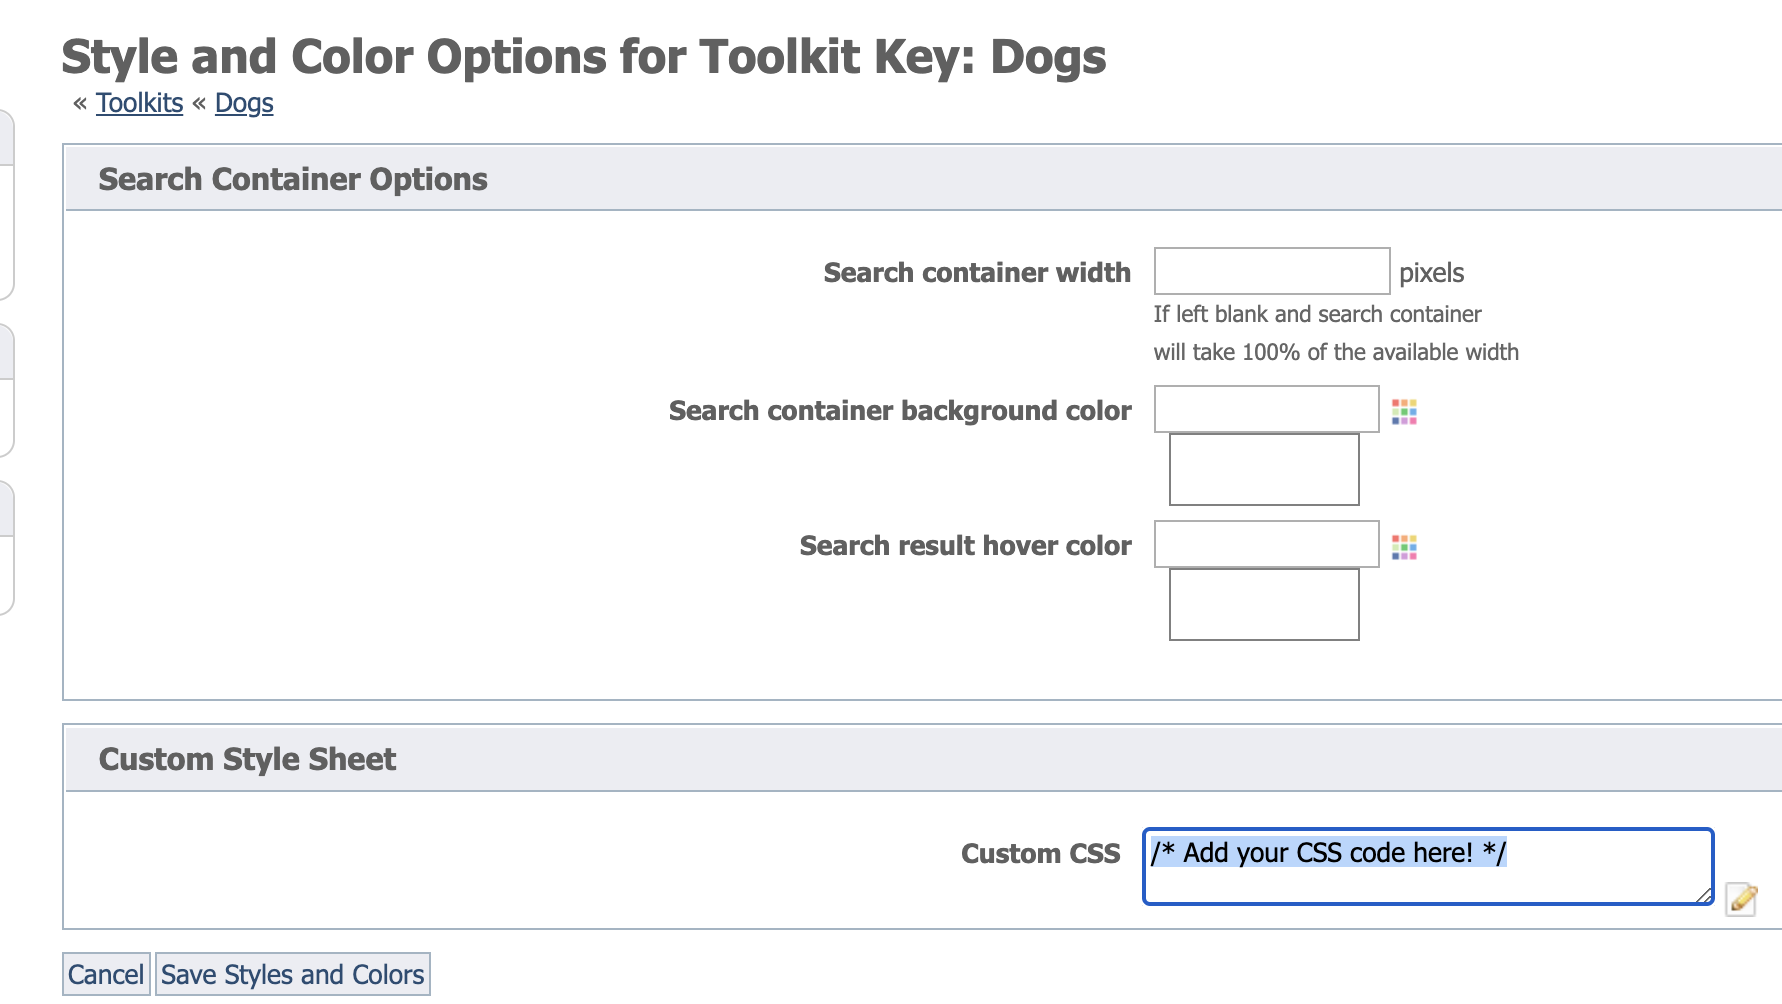
Advanced Styling of Toolkit (Custom CSS)
Within each toolkit layout, there may be some elements that can be further styled to get a more customized look/feel. You can add custom styles to your own third party website, or to the Toolkit itself.Example of styling
Add custom styles to your Toolkit
- Open the Toolkit by going to Features > Pet Adoption Toolkit and selecting the Name of your Toolkit
- Select Update Styles

- Enter your CSS details
Examples
| Info |
|---|
The different toolkit layouts will have different HTML elements and element names, so the examples below may not work for your layout choice. We recommend that you inspect your Toolkit using your browser's Development Tools to ensure you are using the right CSS styles for your particular Toolkit. |
Style text under the animal photo in
...
grid view
...
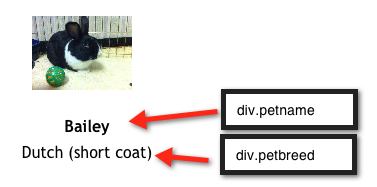
If you wanted to increase the font size of Bailey's name, and remove the breed, you would add the following CSS to the Custom CSS box in the toolkit Key Edit page.
...
Bailey's name is now 22px, and the petbreed field is not showing.
| Tip |
|---|
It helps to use a development tool like Firebug to locate these elements (divs/styles) and preview what your changes will look like. |
...
Remove the Organization Contact info box on an animal's detail page
Add the following CSS to your Toolkit
| Code Block |
|---|
.rgtkPetInfoBox{
display: none;
} |
Increase size of images in grid layout and make them square
If you are using the search layout Grid 3, you can add the following CSS to your Toolkit.
| Code Block |
|---|
.rgtkSearchPetPic {
  height: 150px !important;
  width: 150px !important;
  background-size: cover !important;
  background-position: 50% 50% !important;
} |

Increase the size of primary image on Animal Detail page
For pet2 layout, you can customize the size of the primary image, like in the following CSS code.
| Code Block |
|---|
#rgtkPetPicturePrimary_0 {
width: 250px !important;
height: 250px !important;
}

#rgtkPetPicturePrimaryImg_0 {
width: 250px;
height: 250px;
} |
Overview
Content Tools