You can create a custom menu to replace the default menu provided to you for your website when you activated your Website Service. Your website menu is generally found as a sidebar on either side of the main content of the home page, or at the top of the page. The location of the menu depends on the layout you chose. You can customize this menu.
We encourage you to start by reading the overview and making a plan (see below). Once you create the custom menu (see below), you will then need to fill it with menu items and activate it. The following sections guide you through that process, but remember, you can always fill out a support ticket to get our advice or help.
Where do I find it?
Find the Menus page by going to Website > Menus.

On this page:
Related pages:
How-to Video: Creating, adding menu items and activating your custom menu
Here is a video that can walk you through the process of creating a basic custom menu. (Direct YouTube link here: https://www.youtube.com/watch?v=9TH7J2_PgPE&t=19s)
Before working on a custom menu
Before working on creating a custom menu
It's a good idea to create a Word document of what you want your links to be and what order.
Example 1:
Home
Adopt
Volunteer
Donate
Sponsor
Example 2:
Home
Adopt
Puppies
Dogs
Kittens
Cats
Donate
Contact Us
When you Create a Menu, you will be able to add items to the menu and reorder items so the menu has exactly the items you want your visitor to see.
When your website was created, a default RescueGroups.org website menu was set up for you with links to pages and website features. The default RescueGroups.org website menu will automatically add your custom web pages you create. However, If you switch to a custom menu, you will need to add those pages to your custom menu.
If you activate a custom menu you will need to update the menu manually if you need to make any changes, including removing menu items if you disable a web page.
Creating your custom menu
To create your custom menu:
- Click the Add a Menu button at the top of the page.

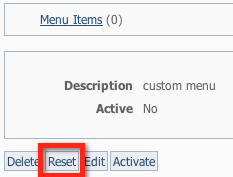
- Enter a name for the new menu and click the Save Web Menu button at the bottom of the field. This new menu will be empty [ Menu Items (0) ] when you create it.

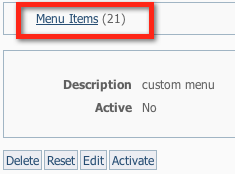
- You can, if you like, populate your new menu with the items from the default RescueGroups.org menu items by clicking the Reset button.
- To add or edit the items in this new menu, click Menu Items ( ) from the top of the page. If you added the default menu items, you will have a number next to Menu Items and if you did not, it will still read 0. Then click the Edit button at the bottom of the description of the menu. For details about adding menu items, see the chapter, Adding menu items (links) to your custom menu.
- You can Activate the new menu by clicking the Activate button.
Popular Questions
- 0votes
- 0votes
- 0votes
- 0votes
- 0votes
- 0votes
- 0votes
- 0votes
- 1vote
- 0votes
Have a question about this topic?
Overview
Content Tools